Block DX Configuration
Block DX is a truly decentralized exchange that enables peer-to-peer trading. Since trading with Block DX is performed directly from the wallet of the assets being traded, these wallets must be properly configured. This guide will walk you through the configuration process, all performed through a few simple screens within Block DX. For the full setup process, see the Block DX Setup Guide.
Click here for a "Getting Started" video on setting up XLite + BlockDX
Written Guide
- Install the Blocknet wallet. The Blocknet wallet is required to facilitate peer-to-peer trading on Block DX.
-
Install the wallets of the digital assets you will be trading and/or the XLite wallet. These wallets are required to store your funds since Block DX is non-custodial. View the list compatible digital assets and wallet versions.
Note: XLite wallet is the only supported lite wallet at this time. Other lite wallets in general, and Electrum wallets, are not supported.
Due to the interactions the wallet needs to make to ensure secure trading, lite wallets and Electrum wallets are not currently supported. However, Blocknet's XRouter allows for the development of decentralized, noncustodial SPV wallets, and XLite wallet is one such wallet. If XLite supports the assets you want to trade, you can use XLite instead of installing the native wallets of those assets. Installing the native wallet of an asset will require downloading the full blockchain of the asset; using XLite will not.
Tip for Goldcoin (GLC) traders
- Make sure you have installed the latest BlockDX (v1.9.0 or greater)
- Make sure you have installed the latest version of Goldcoin wallet (v0.14.7 or above)
- If you created your Goldcoin wallet using an earlier version of the Goldcoin wallet app, you may have a Goldcoin data directory named,
GoldCoin (GLD). You can check this by navigating in a File Explorer (Windows) or Finder (Mac) to this location:- Windows:
%appdata% - Mac:
~/Library/Application Support/ - Linux:
~/
- Windows:
- If you see a directory here named,
GoldCoin (GLD), close your Goldcoin wallet and renameGoldCoin (GLD)toGoldcoin(note the small c in coin). In the case of Linux, rename it to.goldcoin. - Restart your Goldcoin wallet and verify it shows the correct balance.
- If the Goldcoin app asks you to specify the data directory, select the default directory, which should be the new Goldcoin data directory you just made by renaming the old data directory.
-
Install Block DX. This is a desktop dApp and not supported in-browser.
Warning
You must have the Blocknet wallet and the wallets of the assets you will be trading and/or the XLite wallet installed before continuing. You must also have BlockDX v1.9.x or greater to use XLite with BlockDX. Read about when to use XLite vs when to use asset native wallets
2 Step Configuration
Step 1 - This step is required for everyone. This step must be performed before Step 2
When you first open BlockDX, you should see the FRESH SETUP screen below. (If you don't see this screen, choose the Fresh Setup option when it's presented, or arrive at the Fresh Setup option through Menu->Add & Update Wallets.):
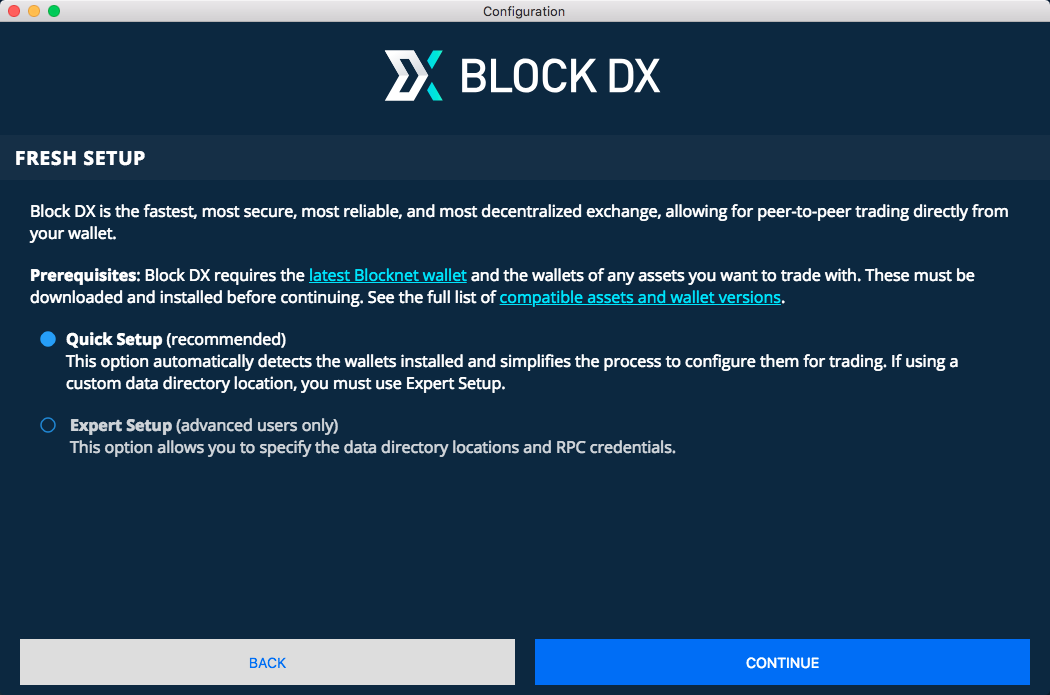
- It is recommended you use the Quick Setup option, but if you use custom data directories for your wallets then you'll need to use the Expert Setup option.
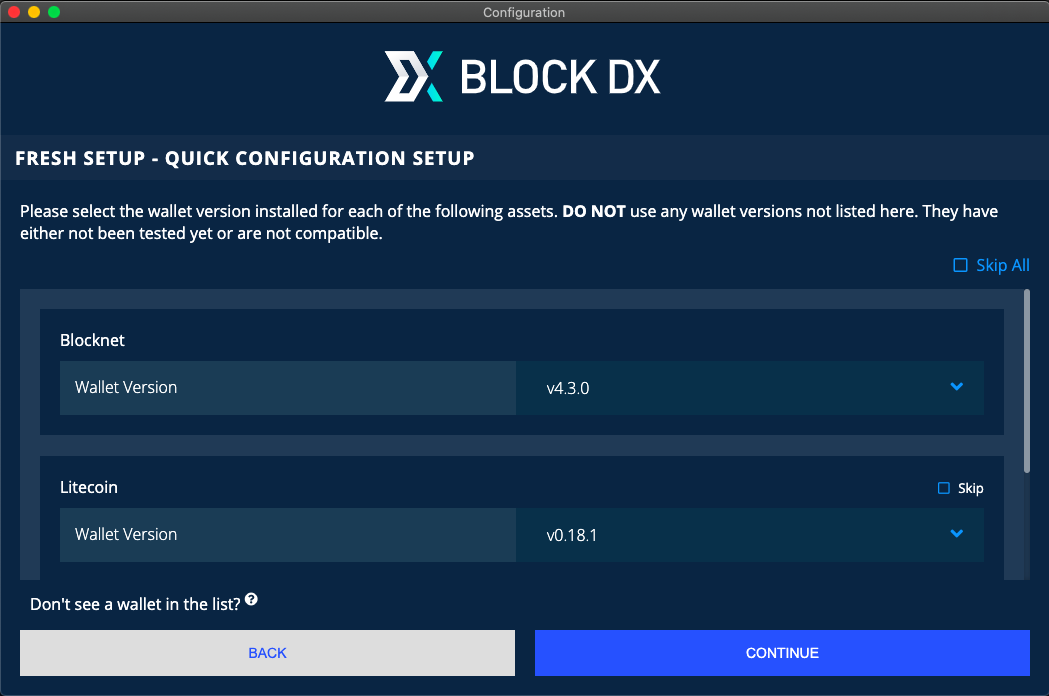
- It's recommended to configure all native coin wallets you have installed.
- Skip those assets you will trade from XLite, even if their native coin wallets are installed.
- Blocknet native wallet cannot be skipped, but you can still trade BLOCK from XLite if you wish.
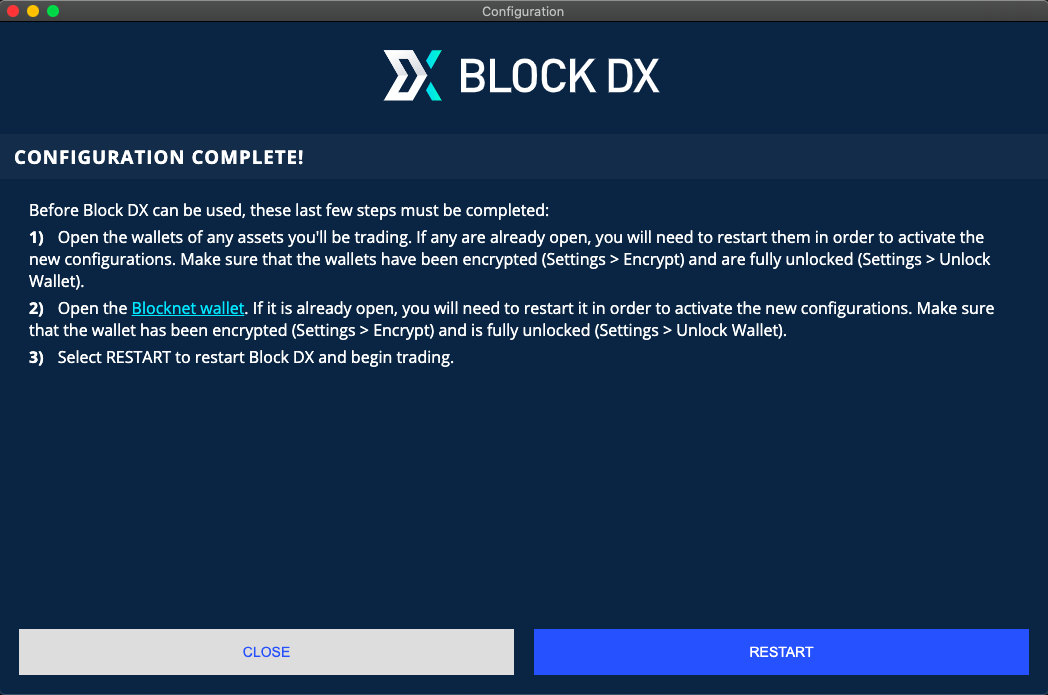
- When you arrive at the CONFIGURATION COMPLETE screen, be sure to carefully read and follow steps 1 & 2 BEFORE clicking RESTART
- After configuration is complete, you can add new wallets or reconfigure existing wallets at any time under MENU->Add & Update Wallets.
Step 2 - This step is required if some of the digital assets you'll be trading will be stored in XLite wallet.
- Firstly, if you haven't already done so, install XLite wallet, create a new XLite wallet for yourself, and backup your 12 word mnemonic phrase, then leave XLite open and unlocked.
- At this point, you should have Blocknet wallet open and unlocked, XLite open and unlocked, and BlockDX also open.
- In BlockDX, you will likely see an OPEN CONFIGURATION screen like this:
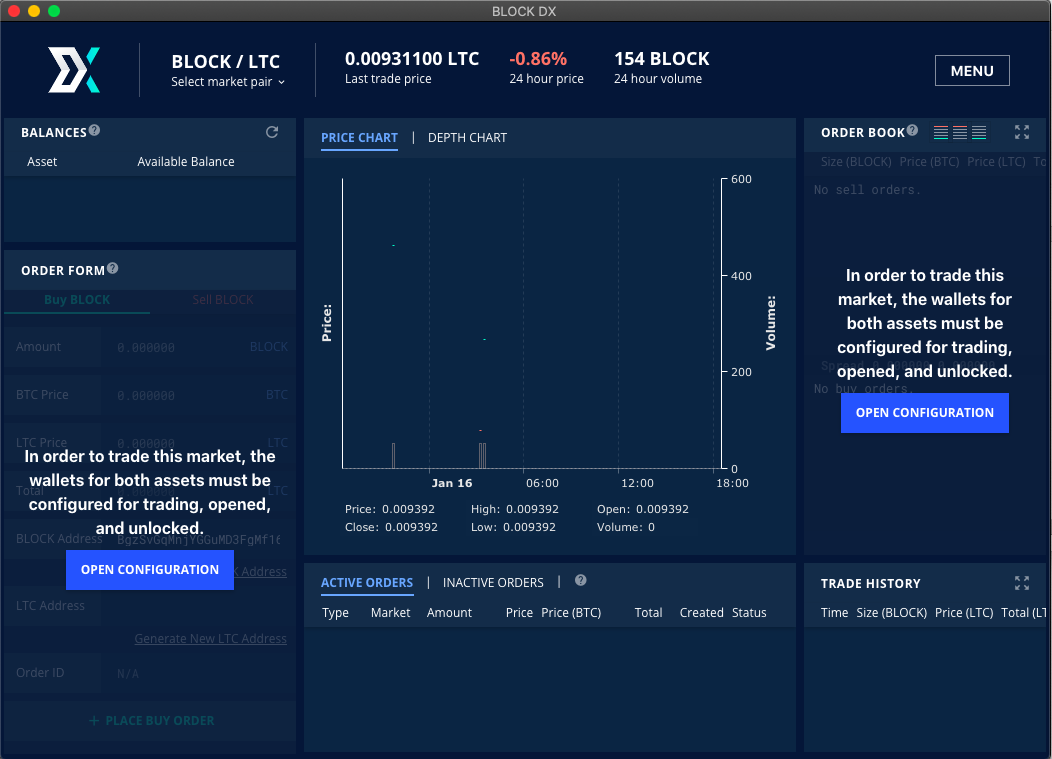
- On this screen, you should click OPEN CONFIGURATION
If you didn't see the OPEN CONFIGURATION screen pictured above, click here.
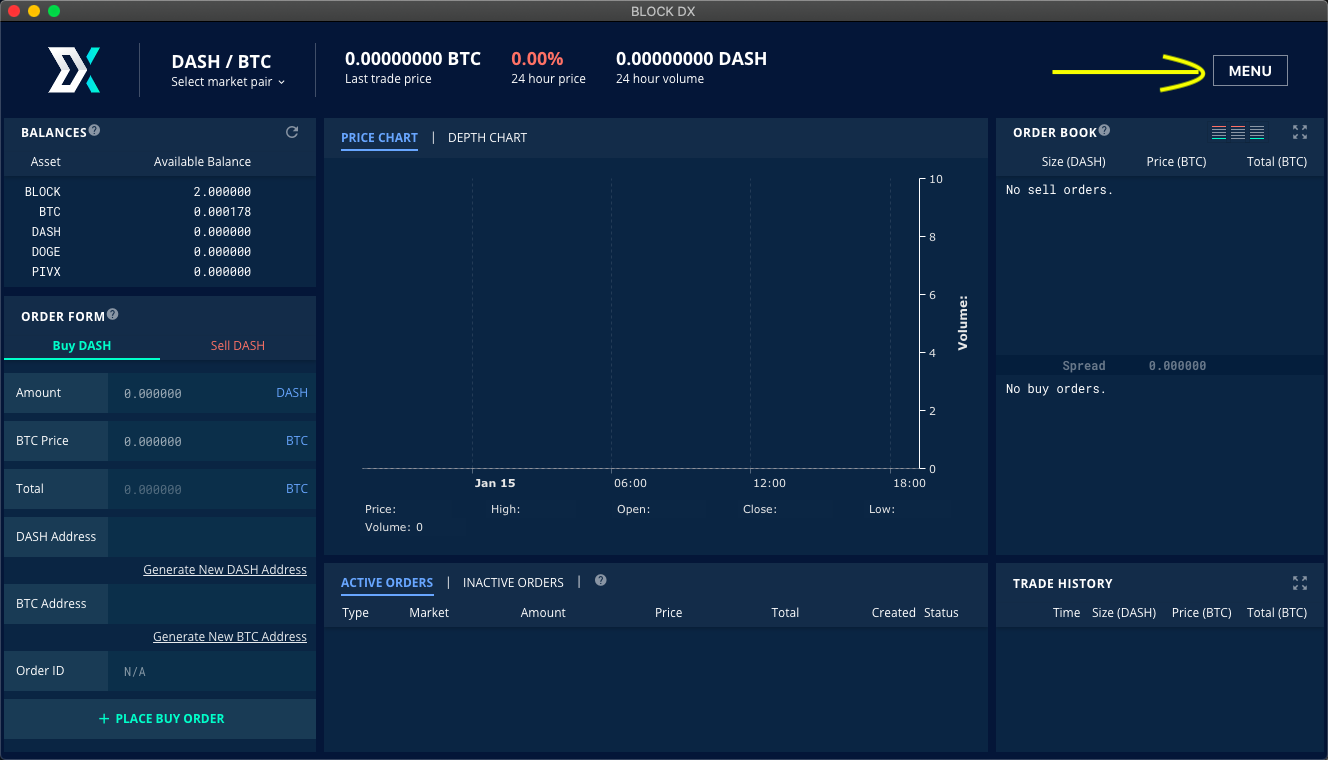
You will likely see a screen similar to this:
- On this screen, select MENU->Add & Update Wallets.
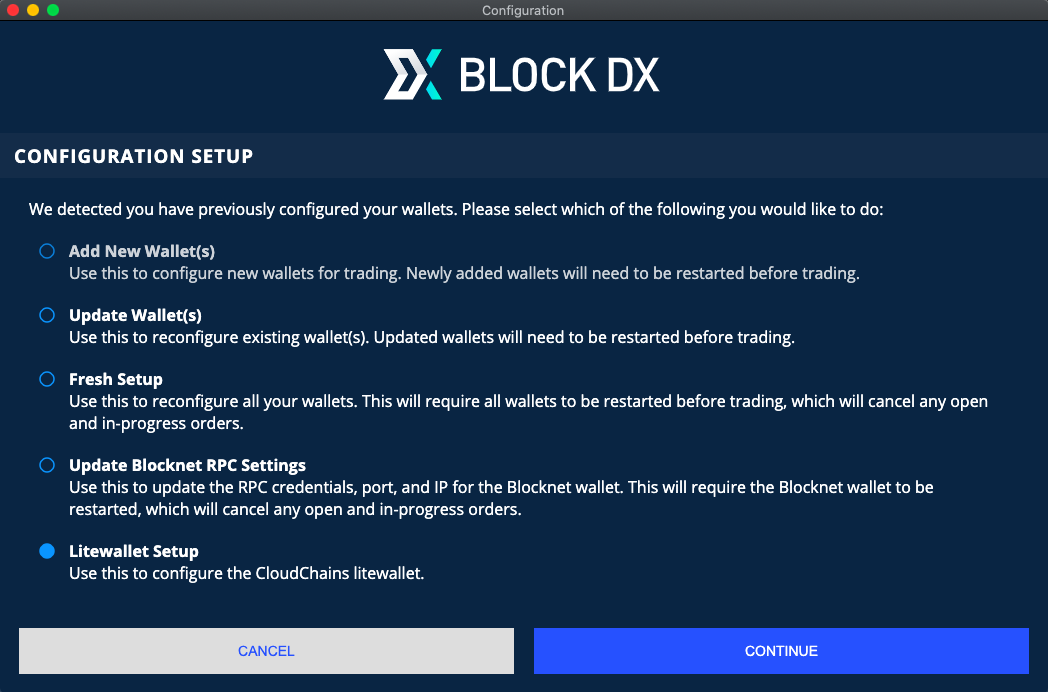
- You should now see a screen like the following and you should select
Litewallet Setup.
Note: Future versions of BlockDX may give an option at this point to specify a non-standard path for the Cloudchains, xlite and/or BLOCK-DX directories.
The defaults for these three directories are:
- Windows:
BLOCK-DXdir is found in%localappdata%;xliteandCloudchainsdirs are found in%appdata%. - MacOS:
~/Library/Application Support/ - linux:
~/.config/
- Clicking CONTINUE on the above screen will take you to the following screen:
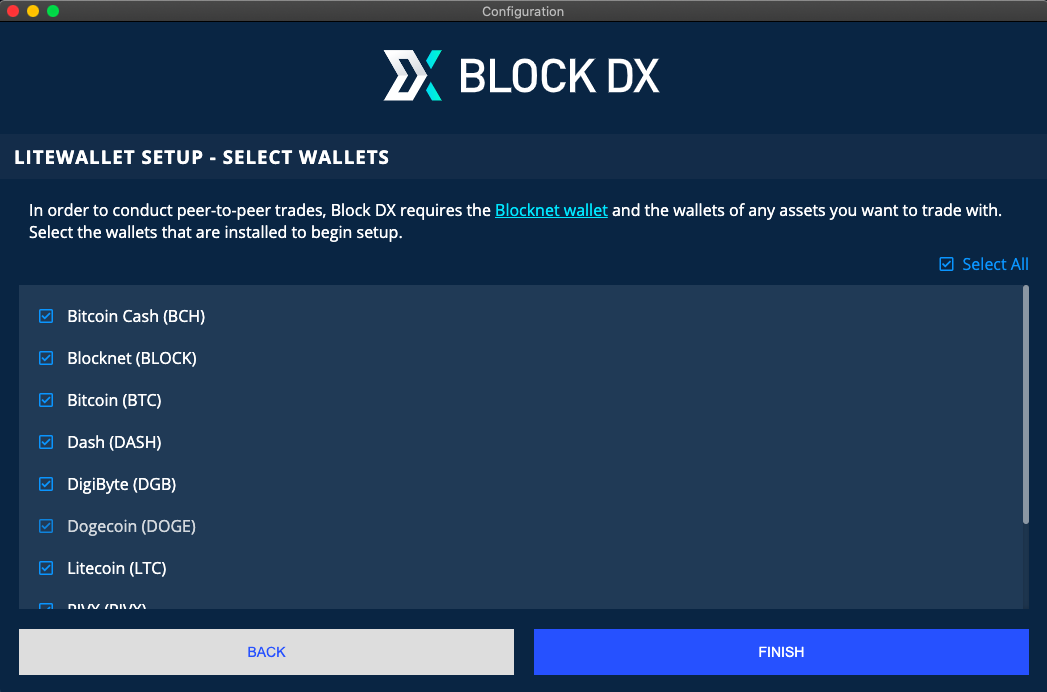
- On this screen, uncheck all assets you don't want to trade from XLite.
- For example, any assets for which you configured the asset's native wallet in Step 1 above should be unchecked. One possible exception to this is the Blocknet native wallet. Even though the Blocknet native wallet was configured in Step 1 above, you should check the Blocknet box here if you want to trade BLOCK from XLite rather than trading it from the Blocknet native wallet.
Tip: Keep a few BLOCK in your Blocknet native wallet to cover Taker Fees.
Taker Fees are currently deducted from Blocknet native wallet. Therefore, to avoid Insufficient Funds errors, it's a good idea to keep a few BLOCK in your Blocknet native wallet. Any BLOCK you may have in your XLite wallet cannot currently be used to pay Taker Fees.
Configuration Complete!
Continue to related guides: