Wallet Installation
Installing the XLite wallet is a simple process. Below are step-by-step instructions for how to install the wallet on each operating system (OS). If you already have the XLite wallet installed and are updating, the steps are basically the same.
Note: SegWit Format Addresses support is coming soon to XLite. However, as of this writing (Dec 4, 2021), XLite does not support sending funds to SegWit format addresses.
Some exchange wallets receive BTC (and perhaps other coins) in SegWit Format Addresses by default. A SegWit format address is sometimes also called a native or bech32 format address. For the moment, you cannot send BTC or other coins from XLite to a wallet using a SegWit format address. You can only send funds to Legacy format addresses. SegWit format address support will be added soon.
Install GUI Wallet
Windows
-
Download the latest XLite wallet There are 3 options:
XLite-x.x.x-win.exe(recommended - works on 64-bit and 32-bit Windows)XLite-x.x.x-win-x64.zip(for 64-bit Windows)XLite-x.x.x-win-ia32.zip(for 32-bit Windows)
Note: Antivirus software may be flagged
It is normal for antivirus software to flag the wallet as potentially dangerous. This is a common issue with most wallets, including Bitcoin's. As long as the wallet was downloaded from https://blocknet.co, https://xlitewallet.com, Blocknet's Github or Blocknet's XLite Github, it can be deemed as safe and the warning can be ignored. You may need to temporarily disable antivirus download protection to complete the download. You can read more about this issue here: https://bitcoin.org.
-
Find the downloaded file. The default location is in Downloads.
- Before continuing, it is recommended to verify your download
- Continue to the instructions below for the download you
selected (
.exeor.zip):
Important Tip: If installation fails to complete for either the .exe or .zip instructions below, click here for instructions what to do.
- Install Visual C++ 2010 Redistributable Package (x64).
- Redo the installation step below (
.exeor.zipdepending on your download).
Using the .exe download (option a)
-
Double-click the downloaded file to begin the installation process.
Note: You may receive antivirus warning messages such as these.
You may recieve warnings from antivirus software. These false positives are normal and can be dismissed.
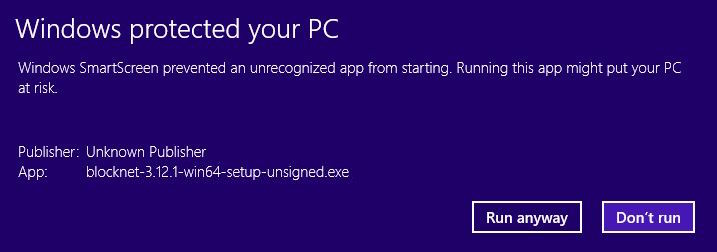
If you have Windows SmartScreen enabled, you may see the following message:
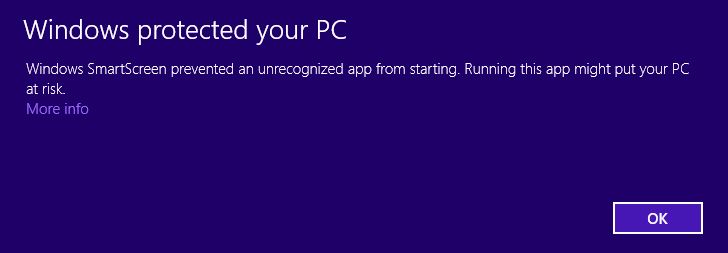
Select More info, then Run anyway to dismiss this message:
-
When the Setup Wizard appears, follow the setup instructions to finish installing XLite.
- When installation is complete, you can delete the
downloaded
.exefile.
Using the .zip download (options b/c)
- Right-click the downloaded file, select Extract.
- After the files are extracted, a new folder should open
with the contents. If a folder did not open, look for the
new folder in the directory where the
.zipfile was downloaded. - In the newly extracted folder you will find the
XLiteexecutable file. - Move this
XLiteexecutable file to where you keep your applications, such as your Desktop. Additionally, you can right-click and Pin to Start or Pin to Taskbar for easy access. - After moving this file, the
.zipand the remaining extracted folders and files can be deleted since theXLiteexecutable was the only file needed.
First Time Opening XLite - Windows
-
Double-click on the XLite icon wherever you installed it.
Note: If you see a Security Warning from Windows asking if you want to Run the file, it is safe to click Run, assuming you have verified your download.
If XLite doesn't open when you double-click it, click here
- Install Visual C++ 2010 Redistributable Package (x64).
- Redo the installation step above (
.exeor.zipdepending on your download).
-
Create & Backup XLite Wallet (Do This Before Funding Your Wallet.)
MacOS
-
Download the latest XLite wallet There is 1 option:
XLite-x.x.x-mac.dmg(recommended)
Note: Antivirus software may be flagged
It is normal for antivirus software to flag the wallet as potentially dangerous. This is a common issue with most wallets, including Bitcoin's. As long as the wallet was downloaded from https://blocknet.co, https://xlitewallet.com, Blocknet's Github or Blocknet's XLite Github, it can be deemed as safe and the warning can be ignored. You may need to temporarily disable antivirus download protection to complete the download. You can read more about this issue here: https://bitcoin.org.
-
Find the downloaded file. The default location is in Downloads.
- Before continuing, it is recommended to verify your download
- Double-click the file to begin installation.
- Click and drag the XLite application icon over to the Applications folder and release.
- If you are prompted with a message asking if you would like to replace an existing version with a newer version, select Replace.
- Find the XLite installation drive on your desktop and eject it. (Mouse Right-click/TrackPad two-finger-click on the XLite icon, then select Eject).
First Time Opening XLite - Mac
- Open the Finder from
the dock,
then click on Applications on the left side of the Finder window to reveal a
screen like this:
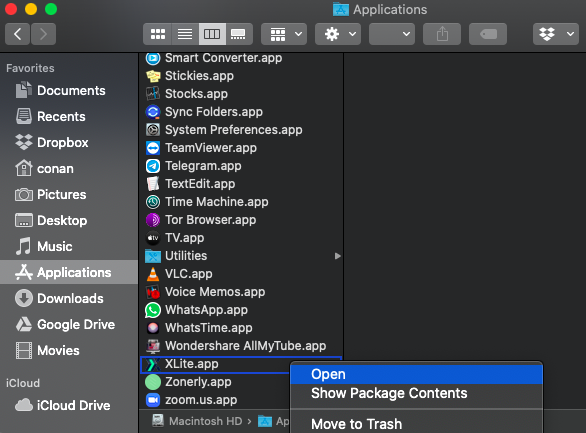
-
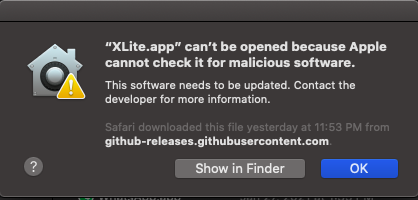
Scroll down to locate the XLite application, then right-click (trackpad two-finger-click) on XLite and select Open to reveal a message like this:
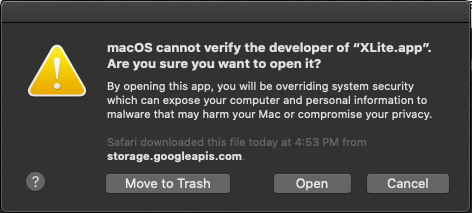
Note: If you see a message like the one below instead of the one above, click OK and repeat step 2 above.
-
Click Open (This is safe, assuming you have verified your download.
- Create & Backup XLite Wallet (Do This Before Funding Your Wallet.)
Tip: After opening XLite the first time as above, you can now use the Launchpad to open XLite in the future.
The above procedure was only necessary due to security precautions your Mac takes when opening a new application for the first time.
Linux
-
Download the latest XLite wallet There are 3 options:
XLite-x.x.x-linux.AppImage(recommended - works on all flavors of Linux)XLite-x.x.x-linux.deb(Install package for Debian & Ubuntu)XLite-x.x.x-linux.tar.gz(Gzip archive - must be launched from Terminal)
Note: Antivirus software may be flagged
It is normal for antivirus software to flag the wallet as potentially dangerous. This is a common issue with most wallets, including Bitcoin's. As long as the wallet was downloaded from https://blocknet.co, https://xlitewallet.com, Blocknet's Github or Blocknet's XLite Github, it can be deemed as safe and the warning can be ignored. You may need to temporarily disable antivirus download protection to complete the download. You can read more about this issue here: https://bitcoin.org.
-
You may be asked for a confirmation to download, select Save File then OK.
- Find the downloaded file. The default location is in Downloads.
- Before continuing, it is recommended to verify your download
-
Continue to the instructions below for the download you selected:
Using the
.AppImagedownload (option a)- Give executable permission to the
.AppImagefile as follows:- Right-click the
.AppImagefile to display a dropdown menu like this: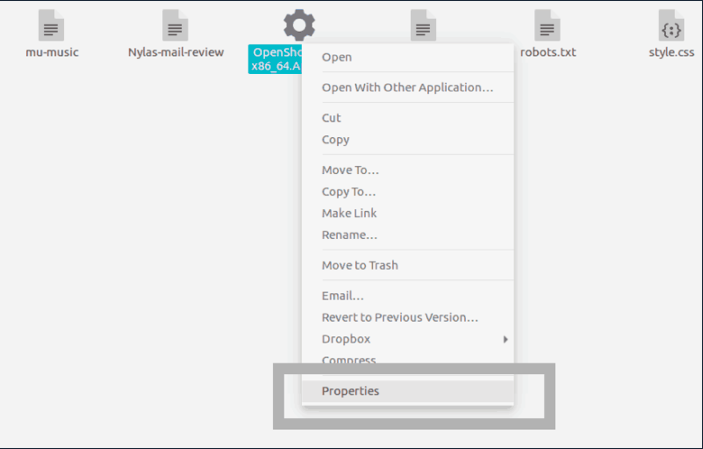
- Select
Propertiesat the bottom of the dropdown to reveal a screen similar to this: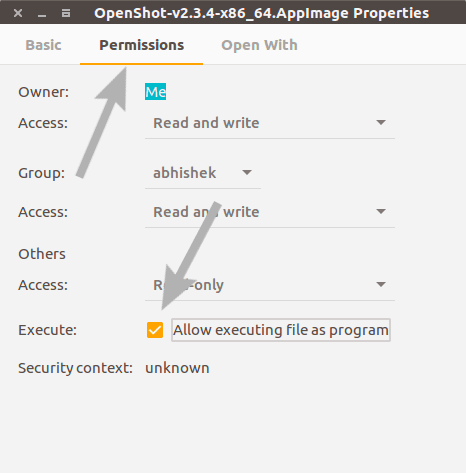
- Select the Permissions tab and check the box, Allow executing file as program
- Click X in the upper left corner of the Properties window to close it
- Note: Alternatively, if you prefer the command line,
you can simply use
chmod u+x .AppImage-Fileto make the.AppImagefile executable.
- Right-click the
- Move the
.AppImagefile to where you keep your applications, such as your Desktop. - Double-click on the XLite icon to open it from wherever you installed it.
Using the
.debdownload (option b)- Double-click the downloaded file to open the installation screen.
- Select Install.
- You may be asked to enter your account password.
- The installation process may take a few minutes.
- Double-click on the XLite icon to open it from wherever you installed it
Using the
.tar.gzdownload (option c)- Open a Linux Terminal.
- Type:
tar -xzvf XLite-x.x.x-linux.tar.gz(replacingx.x.xwith the version you downloaded). - After files are extracted and unzipped by this command, you will see a new directory named
XLite-x.x.x-linux. - Move this new
XLite-x.x.x-linuxdirectory to where you keep your applications, such as your Desktop. - In a Terminal window, type
cd <install-dir>/XLite-x.x.x-linuxwhereinstall-diris the directory where you moved theXLite-x.x.x-linuxdirectory after extracting it, andx.x.x.is the version you downloaded. - Type,
./xliteto run the application.
- Give executable permission to the
-
Create & Backup XLite Wallet (Do This Before Funding Your Wallet.)
Verifying Downloads
It is important to verify the integrity of downloads before running them. Depending on how you downloaded it, it's possible the file may have been modified in transit to do something evil when run. The server hosting the download may also have been compromised.
- Get the sha256 hash of the release you download. These are provided
on the Github release page as
plain text in the release notes. The
format follows
SHA256-hash <filename>. Here is an example of the hashes:95a25f5f903215b38ed5de7bb9f7b91caba6cd979c2100f5203d329bcd9d6bbe XLite-1.0.0-linux.AppImage 1d5a42f2c23be44274708ff3b7816737edf3c6ba6a7f2f9907f3b6515c9f9916 XLite-1.0.0-linux.deb 7777496c75beeb944d2d65d128f22489f4e643da0aa691c457d359addc78b2b1 XLite-1.0.0-linux.tar.gz a0a5135f19867ca6e7fddcced2f29f28281c809fdf192708cd7297511cd5567a XLite-1.0.0-mac.dmg f378be9cec6093ab84e0f2c1e4995d59ed2b9f43395af7530d43aa9d975b8502 XLite-1.0.0-mac.zip 1709c11a4e60483c3680158d4c34f6ba8716142e295c2b59ac56321630e982de XLite-1.0.0-win-ia32.zip 5e1b97b5b8828a6a8a43a8dd9c89f40ee076baa1efee99d41b59558d1c25c07b XLite-1.0.0-win-x64.zip 1c91238d192b7b4b8b7d32e54d4582ebb40f748228ed67f266fd24b929c2eb64 XLite-1.0.0-win.exe - Take a note of the hash for the specific file you downloaded.
-
Get the sha256 hash of the file you downloaded:
Windows
- Open the command prompt.
- Navigate to the location of the downloaded file.
- Enter
certUtil -hashfile filename SHA256withfilenamereplaced by the name fo the file you downloaded.
Example:
certUtil -hashfile xlite-1.0.0-win.exe SHA256MacOS
- Open the terminal.
- Navigate to the location of the downloaded file.
- Enter
shasum -a 256 filenamewithfilenamereplaced by the name fo the file you downloaded.
Example:
shasum -a 256 xlite-1.0.0-mac.dmgLinux
- Open the terminal.
- Navigate to the location of the downloaded file.
- Enter
sha256sum filenamewithfilenamereplaced by the name fo the file you downloaded.
Example:
sha256sum xlite-1.0.0-linux.AppImage -
Compare the release hash to the hash of the download. If the hashes do not match, DO NOT run the file and delete the file immediately.